
How to build a bar.
- engi247
- Jul 24, 2021
- 3 min read
The first step is to plan where your bar is going to be and what shape you want it to be. I went on-line and looked at hundreds of home-built bars to help me decide. I decided to build a dry bar (without a sink) and I wanted a mini fridge to fit into it.

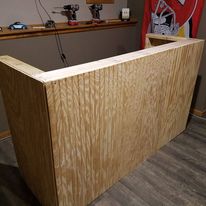
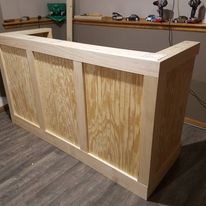
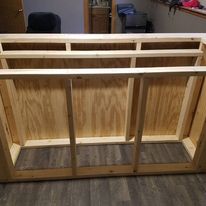
The next thing is you have to frame it. I used 2×6's on the front and 2x4's on the sides to frame it out. The final height of your bar needs to be between 41 to 43 inches tall to fit most bar stools. I built these walls 42 inches tall. I used pine plywood on the outside but you could use almost anything like a metal diamond plate or even corrugated metal. It all depends on your budget and the look you want to go with. I then added the pine trim pieces, I used a 1×6 on the top and bottom and 1×4’s to trim it out the rest of the way. The trim gives it detail and depth and hides the seams where the plywood comes together.
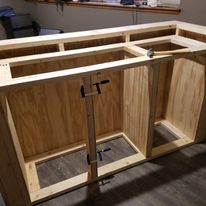
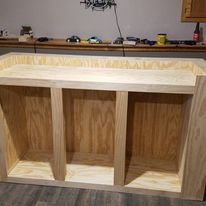
Next step is to finish off the inside walls of your bar. You can do this with drywall or if you have enough left over pieces of veneer plywood you can do what I did. I also trimmed out the edge of the bar top using pine molding.
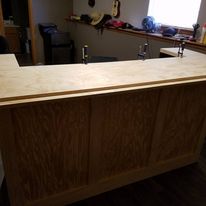


The next step is to build your bar top, this is where it gets a little more complicated. To give your bar that professional bar look I would go with a Chicago Bar Rail to rest your elbows on when at the bar. Trust me it is worth it. If you decide to build your bar top using a Chicago bar rail this requires two pieces of 3/4” plywood one on top of each other. Your bottom sheet has to be 1” 9/16” wider then your top sheet where you are going to have your Chicago bar rail. I made sure I cut the bottom sheet so I would have 10 inches of overhang on the bar where people will sit and your bar stools will be. This gives you enough room so your knees don’t hit the front of the bar when you sit on the stool and straddle up to the bar. If you use a foot rail you might go with more of an overhang. You screw the bottom sheet from the top on to the frame. Then you rip your top sheet remembering where the bar rail will have to be 1” 9/16” less then what you cut your bottom sheet. You then screw the top sheet onto the bottom sheet by screwing under the bottom sheet. Use 1 1/4 wood screws so your screws don’t come through the top of the bar. Mitering the bar rail is easy, just use a 2×4 and set your bar rail onto the 2×4 where the bar rail sits on the bottom sheet of your bar top. Make sure your screws are long enough to go into the bar rail and short enough so they don’t come through the top of your bar rail.


The next step is to sand and stain your bar. I sanded the entire structure using a medium grit sand paper. I then wiped it down using a damp cloth, the damp cloth raises the grain. You do this because the stain will raise the grain in the wood and this step keeps that from happening. I then sanded the entire bar down again this time using a fine grit sand paper. After your bar has dried is when you brush on your polyurethane. After the first coat dries, sand it down using 0000# steel wool and then put on another coat. Now you just need to add bar signs, lights, mirrors, and some memorabilia.

Comments